Favorite Cherry Pie is a delicious take on the American classic tart cherry pie; for when simplicity yields the tastiest results.

Comfortably Domestic Confession: I once ate an entire full-sized cherry pie in one sitting.
It wasn’t even a good cherry pie, either! My friend & I each bought one from a gas station on the walk home from school. We snarfed half of our pies while swooning over Rick-Springfield-as-Doctor-Noah-Drake on General Hospital. Then we polished off the rest while secretly watching MTV with the hope of them playing a Rick Springfield video. Mind you, neither of us were allowed to watch MTV because the videos were Inappropriate for Children. Getting caught would have been a real bummer because we never did get to see any Rick Springfield videos. Back in the day, MTV primarily played a lot of Tom Petty. As if!
I’ve never really forgiven Tom Petty for that indescretion. No offense to Tom or his Heartbreakers, but he was seriously getting in the way of me and my true love tween crush. Twelve year old me was so going to marry Rick Springfield!
Um…yeah. I may of just over-shared just a teensy bit.
Where was I?
Oh, yes…cherry pie…
I love cherry pie. I love cherry pie more than I used to love Rick Springfield.
I’ve received emails requesting my favorite cherry pie recipe, a couple of which also requested a tutorial for a lattice top pie crust.
So let’s do both! My Favorite Cherry Pie with a lattice top crust is as pretty as it is scrumptious.

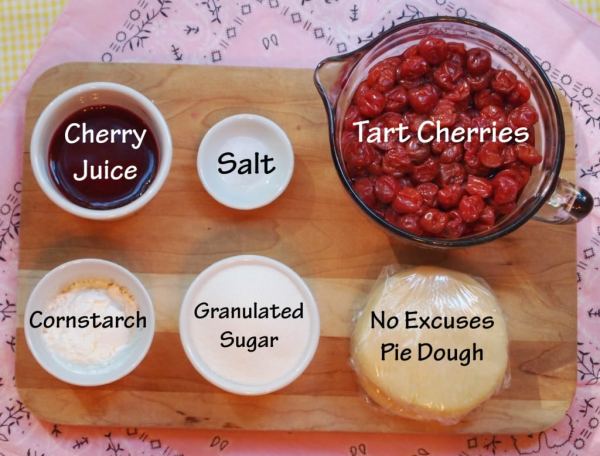
My Favorite Cherry Pie requires: cherry juice (from draining the cherries,) salt, cornstarch, granulated sugar, (frozen) pitted tart cherries, and one recipe of No Excuses Pie Dough. (Or use another favorite double-crust pie pastry recipe.)

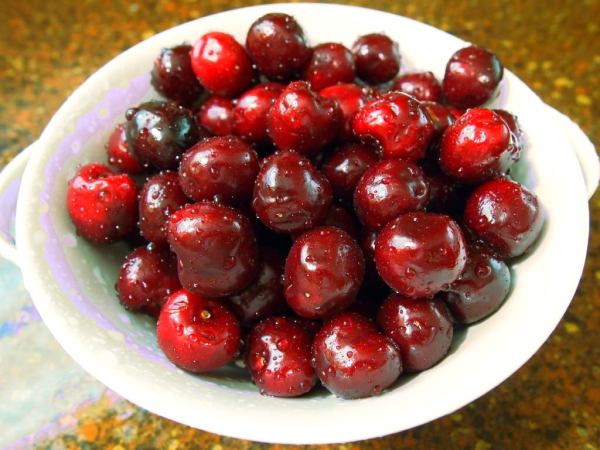
Place the frozen tart cherries in a fine mesh strainer set over a bowl to thaw and drain. No need to compress the cherries because gravity does a good job on its own.
Too much liquid is the enemy of cherry pie, so make sure the cherries are well drained. Tart cherries that have been canned in juice can also be used–just ensure that you have a full 4 cups of cherries after the juices from the cherries have had time to drain.

Once the cherries have thawed, measure the sugar, cornstarch, and salt into a medium saucepan, whisking well to combine.

Mix some of the cherry juice from the thawed cherries with an equal amount of water. Pour the mixture into the pan, whisking until smooth.

Continue to stir the juice mixture with the whisk over medium heat until it begins to boil.

Once the mixture comes to a rolling boil, whisk a little more vigorously until the mixture becomes very thick.

Once the whisk leaves “trails” in the syrup, then you are getting closer. I’m not a fan of runny cherry pies, so I have a Rule:
Just when I think the syrup is thick enough, I cook it a little bit longer. It’s just good policy.

When thick enough, the resulting syrup should run in heavy globs off of a spoon. Fluid yet stout.

Pour the thick syrup over the drained cherries and stir to coat.

Allow the filling to cool completely before rolling out the pie dough. If you’re impatient like me, you’ll pop the filling in the ‘fridge for about 20 minutes to speed things along.

Once the filling is completely cool, roll out the first disk of pie dough on a floured surface , large enough to line a 9-inch deep dish pie plate, leaving a 1 1/2 inch overhang. (An 11-inch circle should about do it.)

Spoon the filling into the pastry lined pie plate. Pop the whole thing, as is, into the refrigerator while you attack the other disk of pastry.
To create a Lattice Top for Favorite Cherry Pie:

Roll out the second disk of pie dough to the roughly same circumference as the first. Then grab a ruler and a pastry wheel. Since I don’t have a pastry wheel, I use a pizza wheel, or for today’s demonstration purposes, a crinkle cutter. A sharp knife works, too.

Use the ruler as a guide to cut 1-inch strips width-wise. I usually get about 10 strips total. The strips will differ in length based on where they are on the circle.

Grab the favorite cherry pie out of the refrigerator. Lay the two longest strips across the center of the pie, intersecting in the middle to form a large cross.

Fold half of the bottom strip back from under the perpendicular upper strip, and lay another strip parallel to that upper strip (about 1/4 inch apart.)

Fold the bottom strip back overlap part of the newly laid perpendicular strip of pastry.

Now fold half of the new perpendicular strip back, lay a new parallel strip of dough across the pie, and then fold the perpendicular strip back over the new one.

The strips of dough should be interlocking to serve as a basis for the lattice weave pattern.

Continue the process of folding back the strips that are underneath, (which are every other strip), and laying down new strips perpendicular to them before folding them back to overlap the new strips, until the weave over your favorite cherry pie is complete.

Use the longest pastry strips in the center of the favorite cherry pie.

Use progressively shorter strips as you work the lattice weave to the edges of the pie.

The resulting lattice weave will leave dough strips of varying lengths around the edges of the pie.
Trim the strips even to the bottom pastry overhang.
Pinch the bottom pastry to the lattice strips and fold them forward,

pinching again to seal and form a 1/4-inch edge around the favorite cherry pie.

To flute the edge of the pie dough:
Push the inside edge of dough outward with your index finger from one hand, while simultaneously pushing the outer edge inward with thumb and index finger of your other hand, at even intervals.

This favorite cherry pie is so pretty!

To make the favorite cherry pie extra gorgeous, whip an egg with a little water to make an egg wash, and brush the top of the pie before sprinkling it with a few pinches of raw or granulated sugar.
Psst! Want to know a secret? For a great pie every time, refrigerate the completed pie for 30 minutes prior to baking. Yes, really! Giving the pie a little time to chill out before subjecting it to the heat of the oven will allow the fats in the dough to firm up after all that handling, which helps ensure a flaky crust later. The chilly time-out will also help the filling set, too.

Preheat the oven to 350° F. While you’re waiting for the pie to chill and oven to heat, re-roll the scraps of dough and cut them into strips. Dredge the strips in a little cinnamon sugar,

and lay them onto a small cookie sheet. Once the oven is hot, bake the cinnamon-y strips at 350° for 5 to 8 minutes, or until browned.

Yay! Pie Snacks! Well, that’s what my grandma always called them.
You know, because you snack on them while your favorite cherry pie is baking.
The Baby calls them “Scrap Cookies.” 😉

Bake the pie for 35 to 45 minutes, or until the filling is bubbly and the crust is golden brown. Let the pie cool completely on a wire rack before serving.
My Favorite Cherry Pie is definitely worthy of devouring anytime–especially while pining away for Rick Springfield! If you’re into that sort of thing… 😉

Oh! If a lattice pie crust design isn’t your thing, then feel free to try a fun free-form cut out design with the other pie crust.
I hope this becomes your favorite cherry pie recipe!
![]()
Kirsten Kubert
Yields One 9-inch Double Crust Pie
For when simplicity yields the best flavor; a delicious take on the American classic tart cherry pie.
3 hrPrep Time
45 minCook Time
3 hr, 45 Total Time

Ingredients
- For the Pastry:
- 1 recipe 5-minute homemade pie crust (or your favorite double crust pastry recipe)
- For the Filling:
- 4 C. (1 quart) pitted tart cherries, frozen
- ½ C. cherry juice (reserved from thawing cherries)
- ½ C. water
- 1 C. granulated sugar
- 3 Tbs. cornstarch
- Hefty pinch of salt
- For the (Optional) Topping:
- 1 whole egg
- 1 Tbs. water
- Raw or granulated sugar
Instructions
- Place cherries into a mesh strainer set over a bowl to thaw and drain. Once cherries have thawed, prepare pie dough according to directions and chill it.
- Whisk sugar, cornstarch, and salt together in a saucepan until blended. Combine water and cherry juice (from the now thawed cherries.) Slowly whisk cherry juice mixture into the sugar mixture until combined and smooth. Place over medium heat and heat to boiling; whisking constantly until very thick. Remove from heat and stir in cherries; cool filling to room temperature. (To speed the process, I've had good luck freezing the filling in a clean, unwrapped Pyrex bowl for about 20 minutes.)
- Roll out one disk of chilled pie dough on a lightly floured surface to 1/4-inch thickness; gently roll dough around a rolling pin to transfer to the pie plate, ensuring a 1 ½ inch overhang.
- Pour the cooled cherry pie filling into the pastry lined pie plate.
- Roll out the other disk of dough to cover top of pie, leaving a 1 ½ inch overhang. Fold both edges over to create a ½ inch rim around the pie. Seal, crimp, and vent top crust as desired. Chill the assembled pie for 30 minutes while the oven preheats.
- Preheat the oven to 350 degrees F.
- Whip egg with water to create egg wash. Brush egg wash over the pie, and sprinkle sugar on top.
- Bake for 35 to 45 minutes, or until filling is bubbly and the crust is golden brown. The filling will set as it cools, so be sure to allow pie to cool completely on a wire rack before serving.
Notes
Prep time includes refrigeration time required prior to baking the pie.


 Save Recipe


Comments